![]()
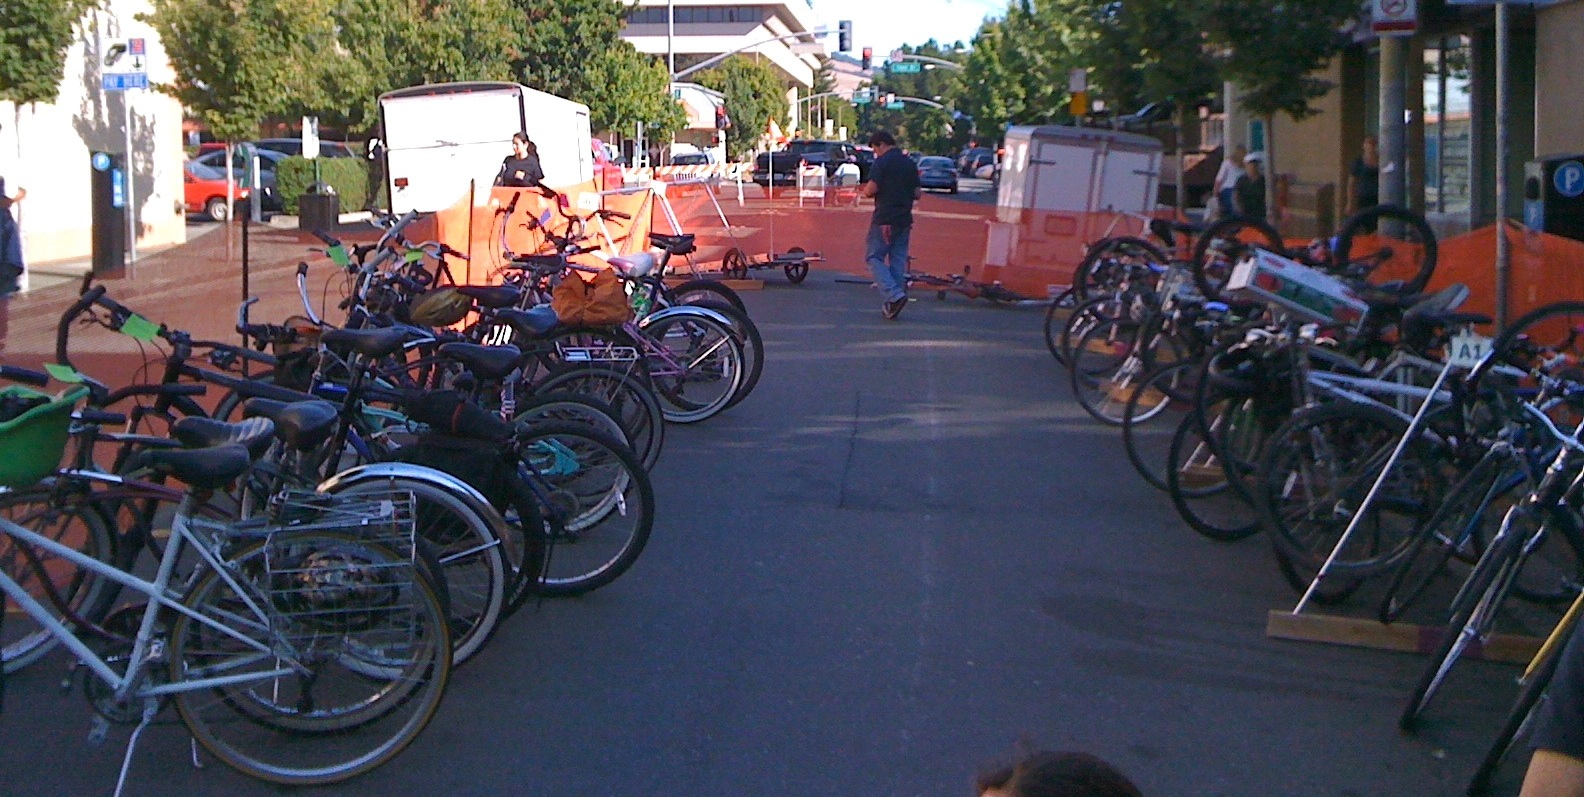
Our typical valet bike parking setup
This is part 1 of a two part series. This part will focuses on all the detailed planning leading up to parking a ton of bikes. Next week will be Part 2 with the actual event where we parked 2551 bikes.
Background
I'm heavily involved in my local cycling advocacy group, and like many bike groups, one thing we do to raise money, encourage more riding, and make ourselves known in the community is Valet Bike Parking. Usually this involves parking 50--100 bikes using 3--10 bike racks (basically an 8--10 foot (3 meter) long metal pipe with legs). A few years ago, our most famous local pro cyclist Levi Leipheimer teamed up with the folks at Bike Monkey (cycling magazine and organizer of local races) to do a big organized ride to raise money for getting the Tour of California to come to Santa Rosa again, and to raise money for Levi's wife's favorite charity. The route is based on a training route that Levi uses, over 100 miles (160 km) with at least 8500 feet (2600 meters) of climbing. There's also 65 mile (100 km) and 35 mile (55 km) options, but over half the riders take the longest option. I've helped in some capacity all three years with the valet bike parking that's set up so that people can enjoy food, beer and a festival after they're done riding. This year I helped out with the planning, especially figuring out the layout. That first year there were 3,500 riders, the second year 6,000 and this year 7,500.
First Year
The first year we were right next to the finish line and the festival (with the beer tent conveniently right in front of us) and parked about 1,500 bikes: more than we'd ever parked at any other event. We ran it similarly to how we'd run an event parking 100 bikes, just with more space and more volunteers. A rider comes in with their bike, a ticket writer fills in a ticket and uses a rack number a runner gave them, and a runner runs the bike to the rack and parks it. At this scale that led to a lot of yelling ("Rack number please?", "I've got 3 spots in C37!") and chaos (5 ticket writers year C37 and now we can't quite fit the bikes). Did I mention chaos?
Second year
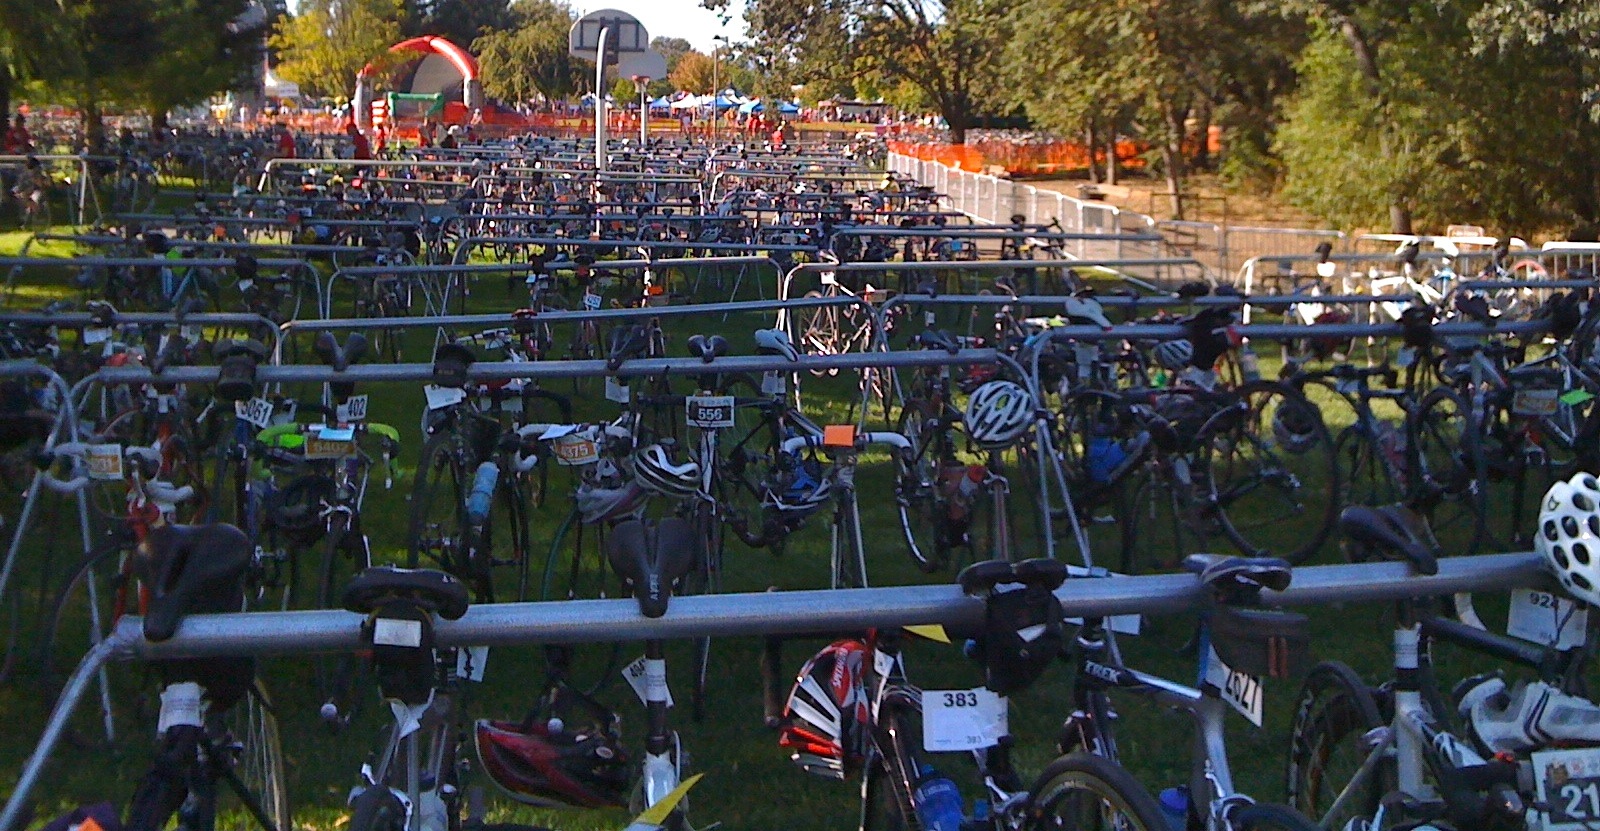
- Fondo parking last year (2010)
The second year we were up a little hill from the finish line and a short walk from the main festival; and we parked about 1,500 bikes, but also handled bag check. I think the distance and visibility is why even with many more riders we didn't park many more bikes. We did a bit of having somebody go and write down rack numbers on tickets for empty spots which involved less yelling and chaos, but there was still plenty of chaos to go around.
This year
This third year we were looking at a spot directly next to the finish line set up to easily guide finishing riders directly into the combined valet bike parking and bag pickup line. We were also being given a smaller space than before so that it could be next to the finish line. And being asked to handle the flow differently with walking people to the bikes so that they exit via a different spot than they enter. The combination of probably many more bikes and less space was greatly worrying. I was thinking we might get as many as 3,000 bikes and was figuring that at best we could fit half that many bikes in the space. Efficient use of the space and re-using spots as soon as they're empty was essential! Additionally, the person who's usually in charge of these things was actually leaving the day before to go on a 5-day fundraising ride. She'd be helping with planning and setup, but wouldn't actually be there the day of.
Planning
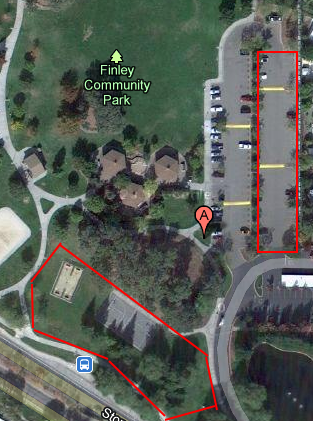
Last year's space is irregular area on lower left with grass and basketball courts, this year
First, we used Google Maps to get a rough idea of the space. Also went on site to look around at things. The new space is definitely smaller, but also flat and fairly regular. There's a couple speed bumps and also a few curbed median things on one side that will block placing racks. One side is a wall at least 10 feet (3 meters) high that helps make our security perimeter simpler. I took the rough measurements and worked it out to about 17,000 square feet (1600 square meters).
First parking plan
It's not obvious from these map pictures, but the divider down the middle of the parking lots has 2 gaps. Our first plan was to use one as an entrance and one as an exit. Use some fencing to control the lines (keeping people from walking across the finish line next door), and a station at either end for somebody to watch our perimeter. One end would be where the bag check was. With further talking with the Bike Monkey folks, they really wanted a single entrance and flow for both bike parking and bag check, so that people pick up their bag at the same time and place that they drop off their bike. Entrance would be at the top with the two gaps both used as exits, because that works best with the flow they've got set up outside our area. And in the morning there would be multiple "satellite" bag check areas with bags moved into the main space after the ride starts.
Math
I also started trying to work out some math, both to figure out how many bikes we can fit and how to fit as many as possible. The racks were actually from a third party, the Vineman Triathlon folks. They've got new racks this year. There was some back and forth discussion and we were able to verify that the racks are 10 feet long including the legs (the old style racks lose more space to the legs). Unlike our racks, they don't have a base, so they should be able to straddle a speed bump if necessary. Our space is 299 feet long and 59 feet wide. But we need some space at the front for the entry and space at the back. So real space usable for racks is more like 270 feet by 59 feet.
Our usual rack setup (alternating directions)
Our usual arrangement involves racks about 12 feet apart with bikes alternating directions (to maximize how many we can get on a rack). With 10 foot racks that gets about 10 bikes on a rack that will be about 7 feet wide. Add in a 5 foot aisle on either side and put a bunch of those racks in a row. Add gaps that line up to give you perpendicular aisles to get around the space. With a 59 foot wide space, the obvious thing is 5 racks end to end with leaving one lengthwise 9 foot wide aisle. We should be able to fit 22 rows. After accounting for exits and curb structures, that's about 100 racks or 1000 bikes. The plan of alternating the direction bikes go into the racks has a few problems: mainly that you often have to do extra walking to get to the correct side of a rack for a given bike, and bikes often get tangled and it's hard to get a bike out. So I also worked out the math if we did all bikes in the same direction in a rack. I took some measurements and made some educated guesses. It helps immensely that for a large road race all the bikes are a similar type with relatively short wheelbases and similar handlebar widths. I figured out that when hanging from the saddle, road bikes seem to stick about 2 to 2.5 feet behind the saddle and 3 to 3.5 in front. Handlebars are about 1.5 feet wide, which with a tiny bit of squeezing is 7 bikes per rack. By having bikes go in "handlebar first" and not walking down the aisles full of that end of the bikes, we can place racks alternating between 7 feet (closed handlebar aisle) and 9 feet (back of bike and 4--5 feet of walking space), and then taking into account exits and curb structures is 155 racks or 1085 bikes, an 8.5% capacity improvement! So I worked with that second "all the same way" plan, and worked out a diagram with measurements marked out, canopies where they should go, everything planned down to the inch with racks alternating 7 feet and 9 feet apart:

First version of parking map (click to zoom)
This was a good starting point for a discussion of details. We decided that color coding regions would be a good idea. Somebody pointed out that I should swap which way the alphabet goes because it would make more sense when standing at the front. Many refinements happened. In the end, this was given to the people that were going to be placing the racks:

Simplified diagram given to people doing the setup (click to zoom)
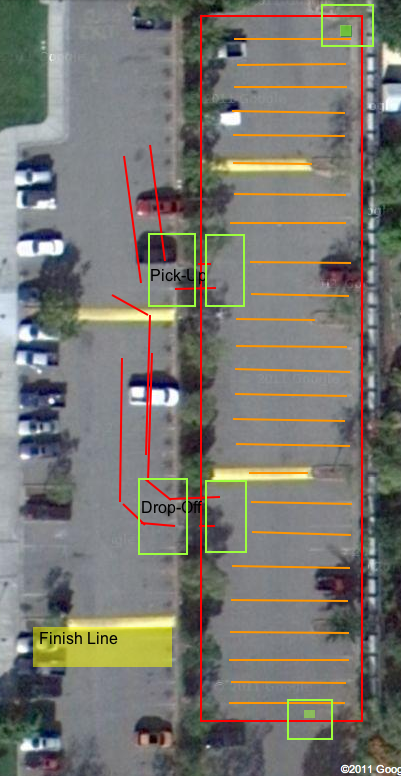
And this was generated for the on-site map to be posted at various spots:
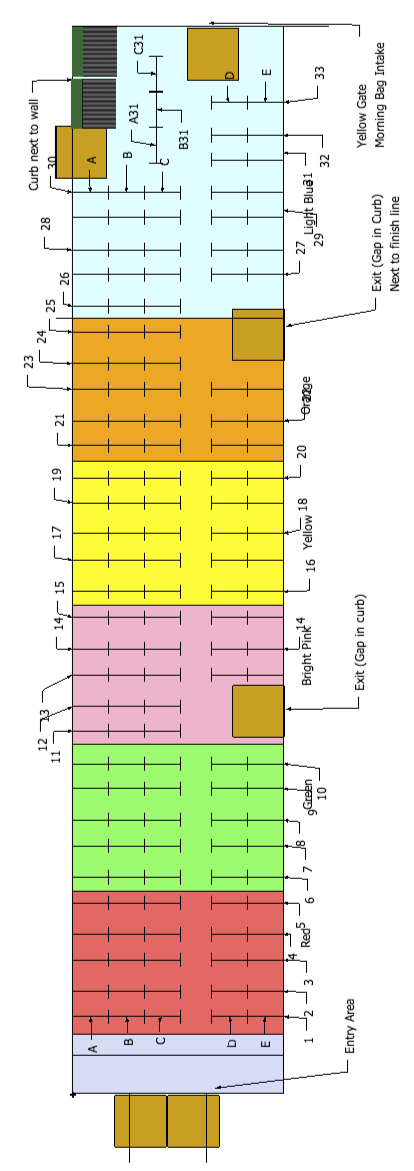
Map posted on site and used for labeling
The plan then is to preprint tickets for each rack+seat, and then have somebody at each exit collect tickets as bikes leave and copy the rack+seat to a fresh ticket that gets sent to the entrance. To my mind this is almost like a multi-threaded computer program. A fresh ticket is a reservation for a place a bike can go. A ticket writer at the front has a pre-pulled set of reserved spots and sends (via runner) those bikes to the spots. When a bike leaves, the used ticket halves are reattached to each other, the identifiers for that spot are copied to a new ticket and that reservation is now open again and sent back up to the front to be sent out again.
Setup

A sea of empty bicycle racks
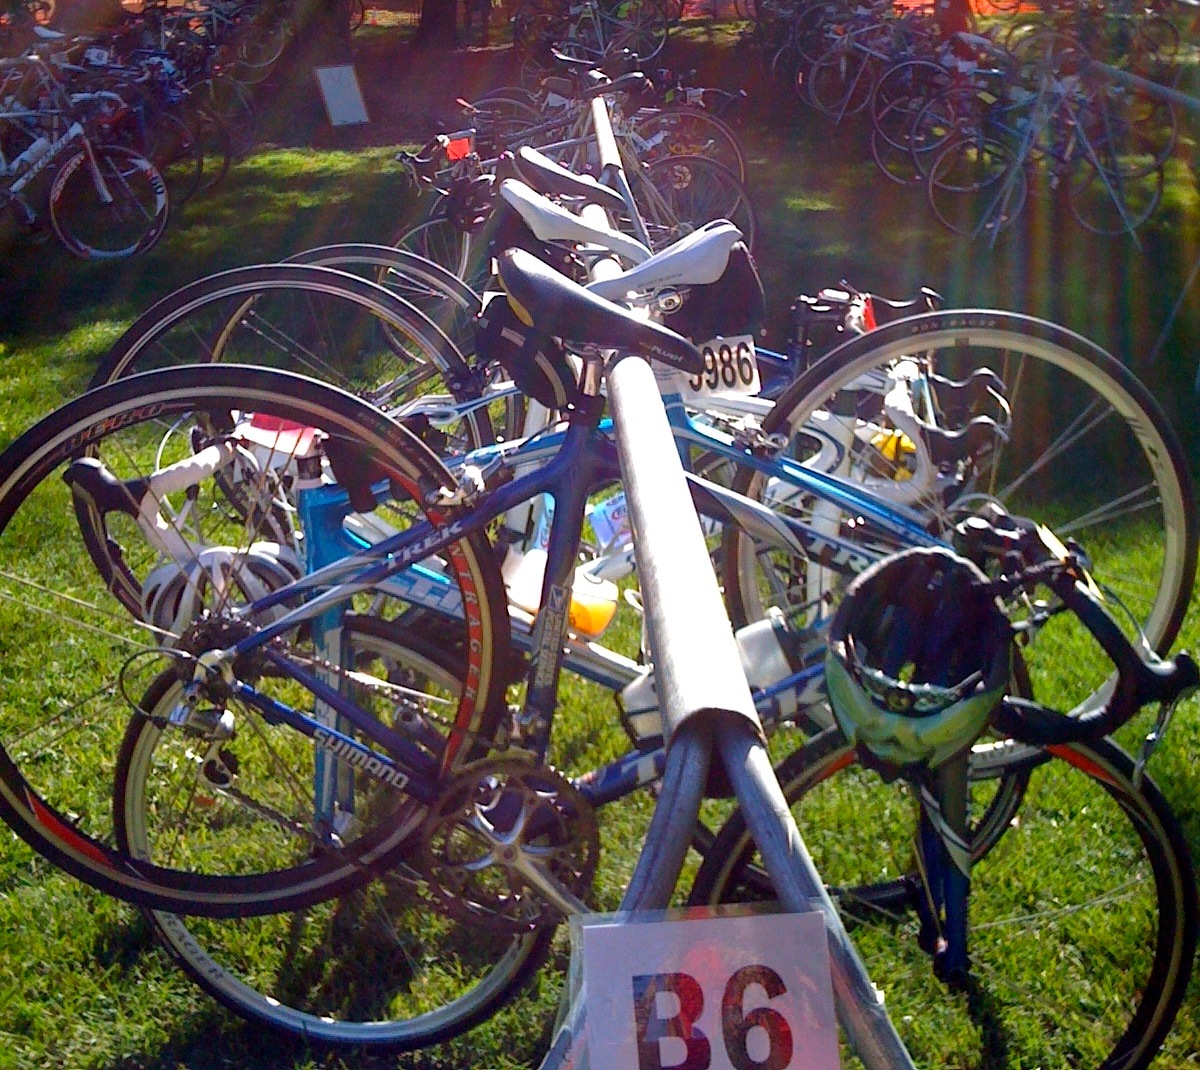
On Wednesday, all the rack tickets were printed. There was some trouble figuring out how to make software work the way we wanted, so the closing time was pre-printed, but each ticket just had a "rack" and "seat" spot and those were handwritten on all the tickets. Part of the bag plan was to use the back area for some bag intake, so we reserved the tickets for those areas to be "released" once bag intake was done and those racks could be set up. We also reserved all the 7th and 8th "seats" on racks so that we didn't have to deal with trying to squeeze that last bike onto a rack unless we were really almost all full up. The primary rack setup happened on Thursday during the day, with vineman folks and some other volunteers. I came along at the end of the day, helped with a few last-minute setup decisions (exits weren't precisely measured on diagrams I had so there were minor adjustments), got counts and measurements for the final map that's above, etc.
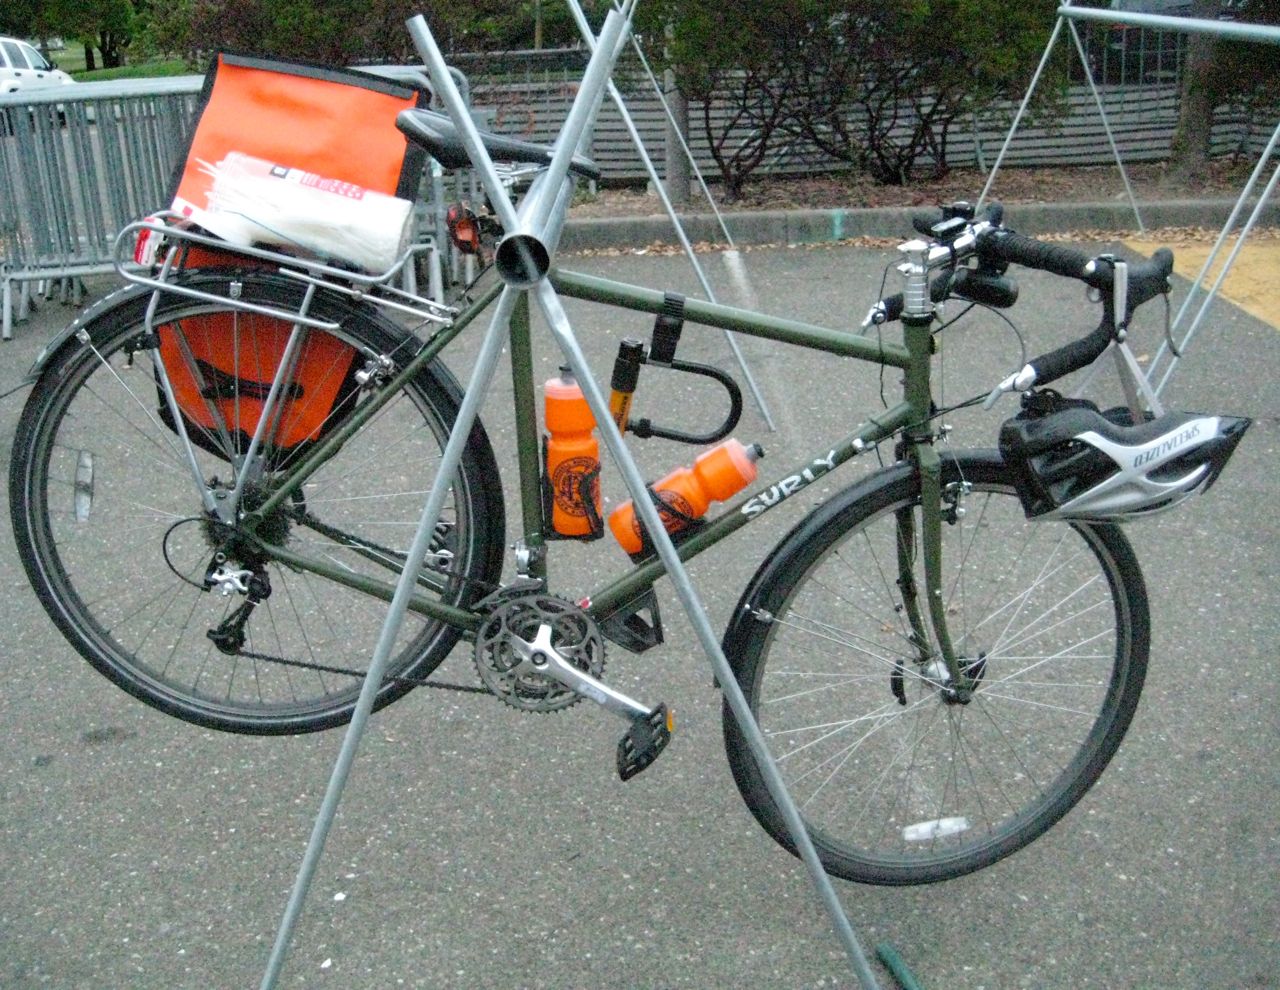
My bike on a rack, showing how they're hung up
Got a chance to take a few pictures, verify exactly where exits and entrances were, etc. I could see that it's difficult to tell a 7 foot aisle apart from a 9 foot aisle, so one of our plans (if it wasn't already; I forget) was to use some chalk to mark things out. To help with navigating the colored sections, in addition to our usual "A1"/ "E33" type rack labels, we'd use some of the same paper as the tags were printed on to color code the racks.
To be continued on Monday...
Filed under Organized Rides Outreach Parking
Tagged: planning, valet bike parking, volunteering
nice blog.. I have a great system for bike valet if you want to hear about it.
I’m interested. What’s your bike valet system?